Welcome, Guest. Please login or register.

Login with username, password and session length


October 10, 2025, 09:12:17 PM
Funfani.com - Spreading Fun All Over!INFORMATION CLUBInformative ZoneHome Sweet HomeResidence Redecoration
Pages: [1]   Go Down
Print
Author Topic: Residence Redecoration  (Read 2854 times)
0 Members and 1 Guest are viewing this topic.
Ryan Martis
FF Hero
*****

Karma: 86
Offline Offline

Gender: Male
Posts: 38649


« on: July 13, 2009, 03:33:09 AM »


It is often said that a person's home is a reflection of the person himself/ herself, which is quite true. We all love our home and want to do it up in a way that reflects our personality, our ideas and our creativity.
If you'd like to make your home your own little space, here are some easy, cost-effective ideas.

Get out those old wine glasses
Who doesn't have the odd wineglass lying around, the only survivor from a favourite set? Over the years, people tend to collect quite a few of these. If your one of those people, here are some ideas on how to use them creatively.

Some of the materials you would need to paint wineglasses are:

~ Tube of black glass relief paint
~ Acrylic paint
~ Fine paintbrushes
~ Palette (to mix the paint)
~ A pair of scissors

Wash out the glasses well and trace the motif of your choice using stencils directly on the glass. If you prefer creating your own design instead of a stencil, just draw your own motif on a sheet of paper, place the glass to be decorated on the sheet, close one eye and outline the image using the black relief paint directly on the glass. Remember, it only works with one eye closed. Try to squeeze the tube evenly so the outline is consistent (you might want to practice on paper first).

Paint the surface outside the motif any colour you like, you can even use a variety of colours. Make sure to allow each colour to dry before using the next.

Paint inside the relief area using a contrasting colour so that the design has more impact (all glass colours can be mixed to produce different colours if required). Leave to dry overnight.

When the glass is quite dry, you can even etch into the paint with a closed pair of scissors. Vary your patterns on each glass.

Use as many colours as you like while painting, you can even add on glitter or fancy beads. Place the glasses all around your room, giving it that extra colour and style you've been seeking.

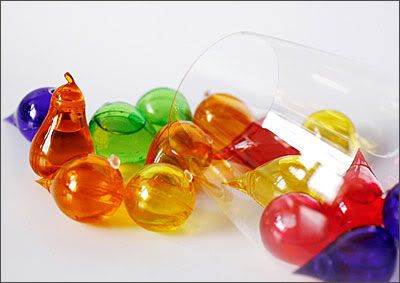
If you don't feel like getting yor fingers dirty, just buy some coloured marbles and pour them into the glasses and arrange them around the room. You could even fill the glasses with coloured water.

Report to moderator   Logged
Ryan Martis
FF Hero
*****

Karma: 86
Offline Offline

Gender: Male
Posts: 38649


« Reply #1 on: July 13, 2009, 03:33:41 AM »


Pictures and paintings are not the only things that can be framed. Most of us have old saris lying around the house. Instead of throwing them away, put them to use.
Saris have lovely borders that can be framed either by themselves or attached to another fabric and then framed and hung on walls. These are a good idea if you have plain, white walls. Framed sari borders add a splash of colour and liven up the room.

All you need to do is cut the sari into the size and shape you want and glue it to a piece of cardboard (that has been cut into the same shape). You can align the saree border with the edges of the cardboard, which creates a frame. Or alternatively, you could get creative with sequins, shells and coloured threads creating a unique frame for each piece. Once complete, you can hang up your creation, making it the centerpiece of a wall or a series of two or three.

Old saris can also be made into light blankets and quilts. To do this, cut up two or three saris into squares of around five inches each. Take an old bedsheet and begin stitching each patch to it using the running stitch. The patches should be stitched edge to edge, covering the entire bedsheet. This makes for a colouful spread that can be used on your beds or even on your sofa.
Report to moderator   Logged
Ryan Martis
FF Hero
*****

Karma: 86
Offline Offline

Gender: Male
Posts: 38649


« Reply #2 on: July 13, 2009, 03:34:10 AM »


What could give a room a more personal touch than old memories of happy times? This is where a collage of pictures does the trick.
To make a collage, you will need:

~ Picture frames
~ Photographs
~ Glue
~ A pair of scissors

Choose a good starter frame (a large posterboard) which is available at any art supplies shop, and get out your albums.

Pick your favourite memories spent with family, friends and loved ones. Cut up the photographs into different shapes, to make the collage look more creative. Once you've finished shaping the photos, it is simply a matter of sticking the photos on the frame to create the collage.

The leftover bits can be used to fill in the gaps between photos and your collage will be complete.

You can hang your collages on your walls, place them on your nightstand next to your bed or put them up in your showcase to make the room your own little collection of memories.
Report to moderator   Logged
Ryan Martis
FF Hero
*****

Karma: 86
Offline Offline

Gender: Male
Posts: 38649


« Reply #3 on: July 13, 2009, 03:34:48 AM »


Instead of painting all the walls in a room a single colour, get creative and paint one wall a different shade. Go down to you local hardware or paint shop, and pick up a can of your favourite colour. It could be a cheery yellow or a deep purple or any shade that matches your mood or personality. Don't forget to pick up a paintbrush (four inches wide) while you're there.
Once you've picked a shade, get into some old clothes (that you can throw away later) and get painting. Paint the central wall using long brush strokes. If you're not feeling adventurous, you can paint three walls of a room a dark shade and keep one of the walls a lighter shade of the same colour. This will help lighten the monotony in the room.

If you fancy your artistic skills, you can create your own mural or experiment with textures. One easy way to add texture to your wall is to dip the tip of the brush into the paint and holding the brush at a right angle to the wall, dab on the paint.

While choosing a colour, ensure that the colour you pick does not clash with the other walls or with the furniture.
Report to moderator   Logged
Pages: [1]   Go Up
Print

Jump to: