Welcome, Guest. Please login or register.

Login with username, password and session length


April 27, 2024, 10:46:32 PM
Funfani.com - Spreading Fun All Over!INFORMATION CLUBInformative ZoneHome Sweet HomeBrighten your Diwali.
Pages: [1]   Go Down
Print
Author Topic: Brighten your Diwali.  (Read 6091 times)
0 Members and 1 Guest are viewing this topic.
Ryan Martis
FF Hero
*****

Karma: 86
Offline Offline

Gender: Male
Posts: 38649


« on: July 13, 2009, 02:26:14 AM »

Make your own lanterns & diyas this Diwali!


Come Diwali and most of us hit the market to buy diyas, lanterns and candles. However, with some effort and innovation, all of these ornaments can be made at home -- not only will your Diwali props have your own personal touch, but they will also give you immense satisfaction.
Presented here are do-it-yourself methods for lanterns, diyas, candles and even a few rangoli tips!

The traditional lantern (kandil)
You will need:
~ A sheet of tinted colour paper (19cm x 8.5cm)
~ Silver/ gold-finish gift-wrapping paper (19cm x 8.5cm)
~ Cardpaper sheet (20 cm x 6.5cm)
~ A bulb holder
~ String
~ A pair of scissors
~ Glue

Method:
~ Holding the rectangular coloured sheet of paper vertically upright, bring its longer sides together and fold it into a perfect half.
~ Next, bring the folded sheet back into the horizontal position, such that the folded side is now facing you. Using the scissors, cut 1-centimetre thick strips straight up through the folded sheet, starting from the folded edge. Leave a one-inch gap at the top of the paper so that the strips are not entirely cut away.
~ Set the coloured paper aside and roll the cardpaper sheet into a cylinder widthwise, not lengthwise. Glue both ends of the cardpaper sheet together such that a regular electric bulb would fit comfortably into the cylinder formed.
~ Once the cylinder is ready, take your wrapping paper in hand and starting from the bottom edge of the rectangle, cut long centimetre-thick strips up to the top, leaving just an inch-thick row at the top so that the strips are not entirely cut away.
~ Glue the wrapping paper's inch-thick row around the bottom of the cardpaper cylinder (on the inside), so that the tassles hang down out of the cylinder.
~ Next, unfold the coloured paper -- you will find the strips are cut into it, while an inch-thick row above and below them remains intact. Wrap the coloured paper around the cardpaper cylinder, glueing the top row to the cylinder top and the bottom row to the cylinder bottom, such that the strips and the gaps between them swell outward.
~ Your Diwali lamp is now ready -- all you have to do is introduce a bulb-holder into the cylinder, along with a bulb, of course! Also make tiny holes at the top of the lantern through which you can pass string to hang it up.

Report to moderator   Logged
Ryan Martis
FF Hero
*****

Karma: 86
Offline Offline

Gender: Male
Posts: 38649


« Reply #1 on: July 13, 2009, 02:27:21 AM »

Creating candles


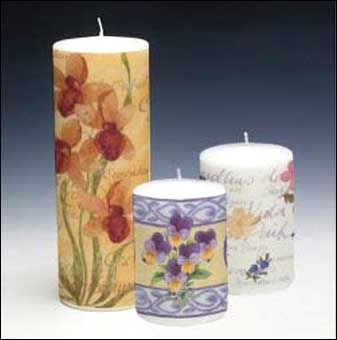
Candles come in all sizes, shapes and colours and are easy to make. Not only do they have great decorative value, they make for great gifts too.
You will need:
~ Paraffin wax
~ Wicks
~ Moulds, or a steel/ glass container (chocolate moulds will also do)
~ An aluminum pot/ vessel to melt the wax
~ A wooden spoon to stir the wax
~ Vaseline or oil for greasing
~ Wax colour (wax crayons are useful too)
~ Scented or aromatic oils if you want to make scented candles

Method:
~ Start by melting just a little wax -- dip the wicks in melted wax and set them aside to cool (this will help them light easily once they are part of your candle). Also keep your moulds ready by greasing their insides with oil or vaseline.
~ Place the paraffin wax in the aluminum pot and start heating on a low flame. If you like, add some wax colour or dip the wax crayons into the wax while it is melting, to obtain the desired colour. Keep stirring with a wooden spoon, so the colour mixes properly.
~ Turn off the heat. Place the wicks in the candle moulds and then pour in the melted wax, making sure to hold one end of each wick in the centre of the mould till it is full -- else it may get drowned in the wax. Make sure there are no air bubbles and leave the wax to cool in the moulds.
~ Once the wax has set solidly, turn the mould upside down and tap it lightly. Refrigerating the moulds also helps neatly remove the candle from them.
~ Decorate the candles with dried/ artificial flowers, sequins, lace or whatever else you desire. You can either stick them on, or heat a spoon and touch it to the candles, wherever you want to add on the decoration. As the wax melts, add the flowers, sequins etc.
~ For scented candles, add four to five drops of scented/ aromatic oils to the wax when it is in a liquid form. However, make sure that you don't add the scented/ aromatic oils when the wax is very hot -- preferably, pour it into the mould and then add the oils.
~ If you plan to make gel candles, you can follow the same procedure as outlined above. Make sure to use a double boiler to melt the gel wax, however, as it can catch fire if heated directly on a high flame. Gel candles are set in transparent moulds, like wine glasses or candle glasses, available in all sizes and shapes. Moreover, since gel wax is transparent, you can add decorations of your choice, like shells, pebbles, beads, and even tiny cartoon figurines to the candles.
Report to moderator   Logged
Ryan Martis
FF Hero
*****

Karma: 86
Offline Offline

Gender: Male
Posts: 38649


« Reply #2 on: July 13, 2009, 02:28:13 AM »

Decorating diyas


What is Diwali without diyas? While very few would be interested in making their own from scratch, you can certainly decorate yours to make them truly unique.
What you need:
~ A few earthen diyas (they cost very little and come in many shapes and sizes)
~ Oil or fabric paints
~ Varnish
~ Mirror work, sequins, lace etc to decorate

Method:
~ Soak your earthen diyas in water for two days and leave them to dry naturally. By doing this, they will soak up less oil when lit.
~ Coat the outside of each diya with paint. You can use oil paint but it requires at least two days to dry. Fabric paint is a good alternative -- it dries in a couple of hours.
~ Next, coat each diya with varnish before you add on any decoration -- this will make them washable and longlasting.
~ While the varnish is still wet, add on the bits of mirrorwork, sequins or glitter -- any decorations you want, so that your diyas stand out as little works of art.
Report to moderator   Logged
Ryan Martis
FF Hero
*****

Karma: 86
Offline Offline

Gender: Male
Posts: 38649


« Reply #3 on: July 13, 2009, 02:29:04 AM »

Ravishing rangolis


While most people these days prefer to use readymade cut-outs to create rangoli patterns in and around their homes, there are a few who would rather do it -- or try to do it -- by hand!
What you need:
~ Chalk
~ Rangoli powder (rice powder coloured with dye)
~ Additional rangoli decorations like flower petals, turmeric powder, zari etc (optional)

Method:
~ Swab the area where you will be creating your rangoli (it should be a smooth, flat surface) with a wet cloth and wait for it to dry.
~ Next, using a piece of chalk, draw your rangoli design on the surface -- it can be any design of your choice, but make sure it is of a symmetric nature. If you're not too good at free-hand, you can use tracing paper to outline a design of your liking and then using a pair of scissors, cut the desired shapes into it. This will serve as your very own homemade rangoli cutout.
~ Now comes the hard part. Using the rangoli powder, you have to fill in the design -- take pinches of the powder between your thumb and index finger and fill in the empty areas, staying well within the lines.
~ Besides powder, you can also use flower petals, yellow or orange coloured dal) and zari to lend colour to your rangoli. You can also use place diyas around or on your rangoli to add a festive touch.
Report to moderator   Logged
Pages: [1]   Go Up
Print

Jump to: